How to Add Products to Your NEPA Store
Welcome to NEPA Marketplace! This step-by-step guide will walk you through the process of adding products to your online store, ensuring your items are ready for shoppers to discover.
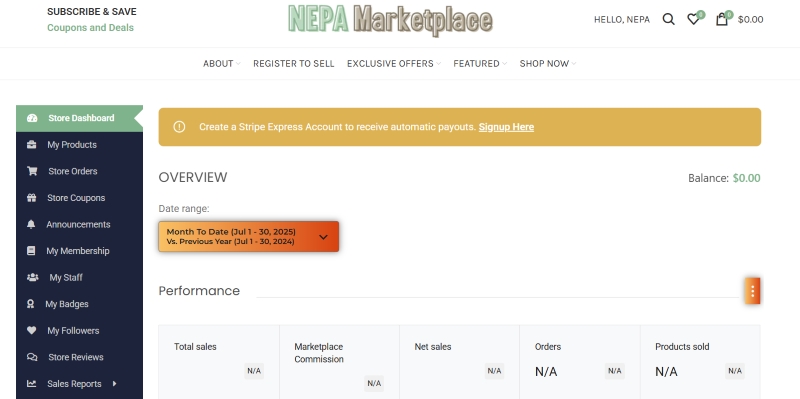
1. Access Your Store Dashboard
To begin, you’ll need to log in and navigate to your store dashboard.
After logging in to NEPA Marketplace, you will be directed to your personalized STORE DASHBOARD.
2. Navigate to the Products Section
From your store dashboard, locate the product management area.
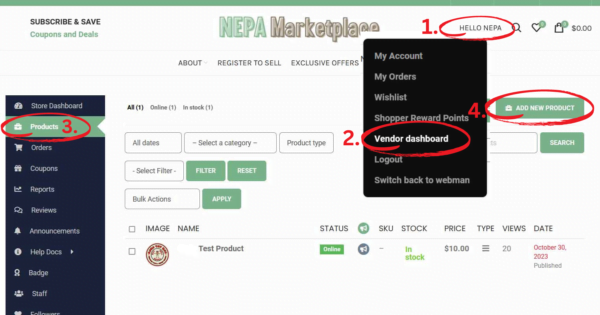
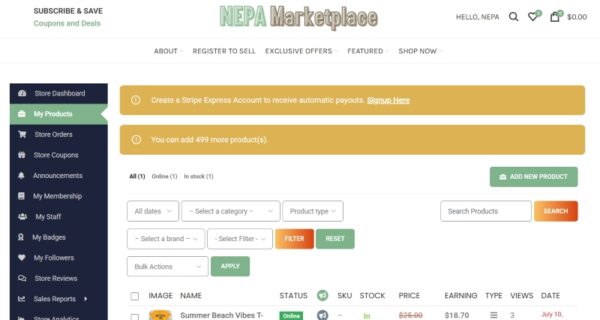
Located on the left-hand menu of your Store Dashboard, click on My Products.
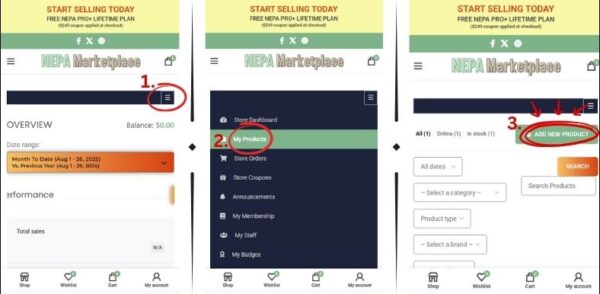
To add a new product from your mobile device:
1. Click the Hamburger Menu on the right.
2. Click My Products on the menu.
3. Click Add New Product on the right of the product management screen.
3. Add a New Product
Now, let’s start creating your product listing.
On the My Products page, locate and click the Add New Product button, typically found in the top right corner.
You will open a new window where you will be able to create a new product by providing all the details.
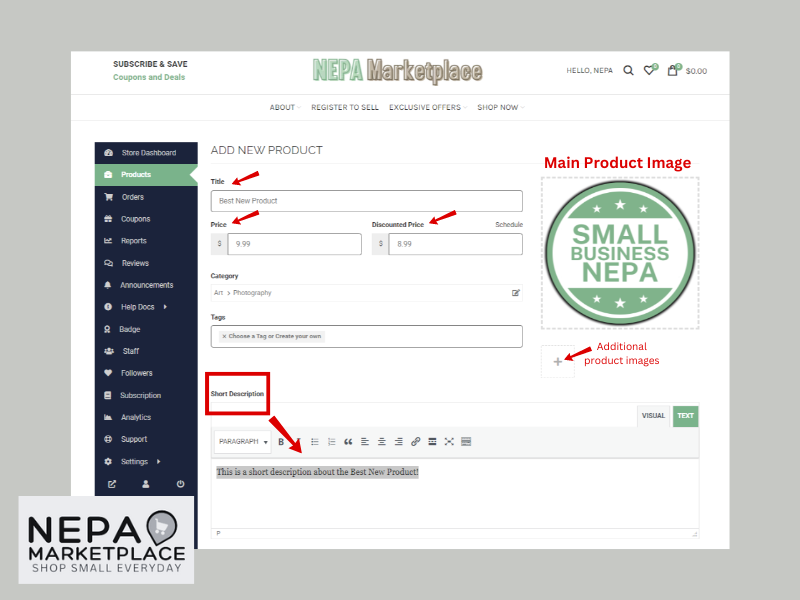
4. Enter Basic Product Details
The common information about a product are the Title, Price and Description.
Product Title: Enter the name of your product
(e.g., “Handmade Artisan Soap – Lavender Bliss”).
Price: Input the regular selling price for your product
(All prices are USD).
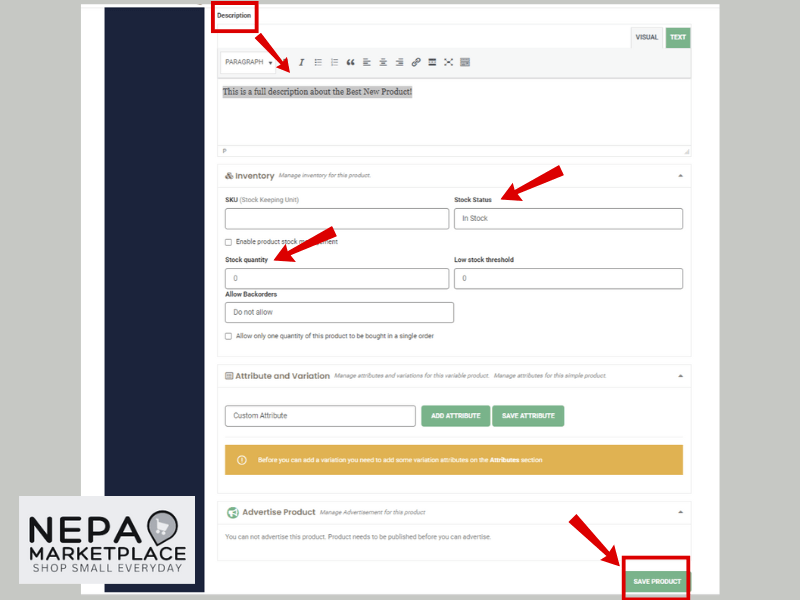
Description: Provide a detailed description of your product, highlighting its features and benefits.
Enjoy Our Newest Feature: You can use Gemini AI to help write the product information.
Discount Price: (Optional): If you’re running a sale, enter the discounted price here.
[link to “How to Schedule a Sale” tutorial].
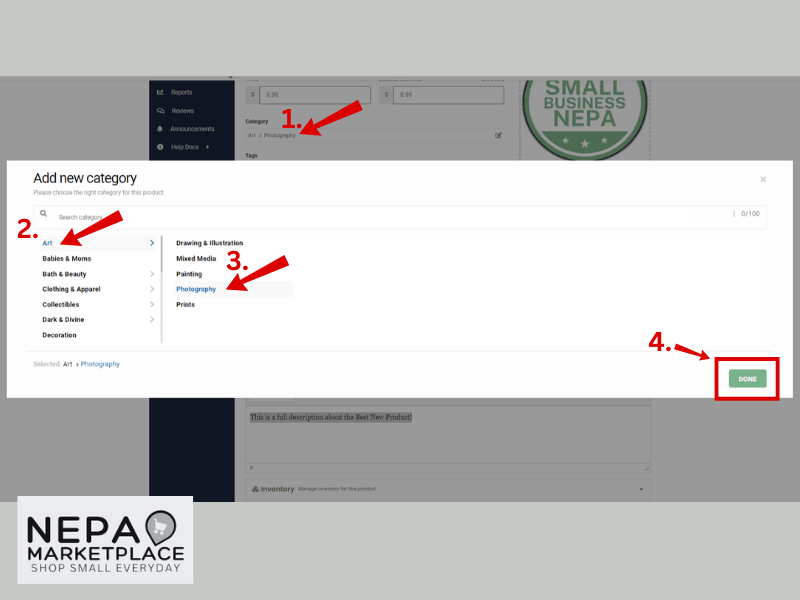
5. Select Product Category
Proper categorization helps customers find your products.
Category selection is singular. That is why there is a drop-down field to select a category.
This is the standard-setting. Because according to Google Guidelines and other SEO and best practices, it is recommended to have only one category assigned to a product.
Vendors need to select the category from the drop-down.
Categories: Choose the most relevant categories for your product from the provided list (e.g., “Health & Beauty,” “Handmade Goods”).
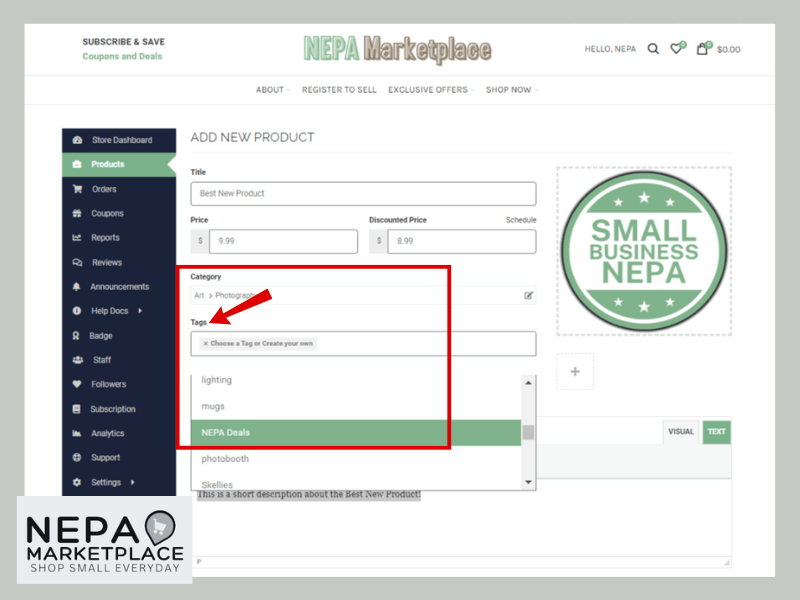
6. Create Product Tags
Vendors will be able to choose existing product tags or create new product tags from the store dashboard.
Under the Tags field, start typing a tag and Press Enter. The word or phrase will be added as a separate tag.
Tags: Select 2-3 appropriate tags that describe your product (e.g., “organic,” “vegan,” “gift”).
Product Type – Simple Product
These types of products are simple and have no variants. They are single and standalone products, which do not require any other information to define different variants.
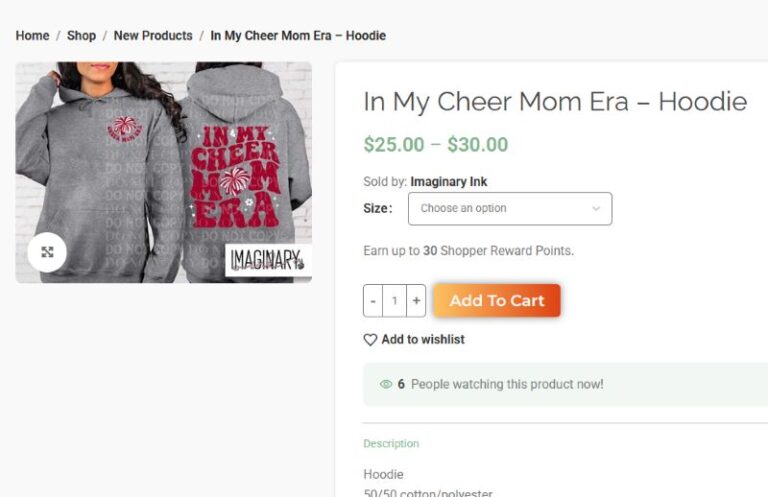
Product Type – Variable Product
A variable product is a type of e-commerce product that offers different variations or options to customers, such as size, color, or material.
Instead of creating separate product listings for each variation, a single variable product can encompass all these options on one product page.
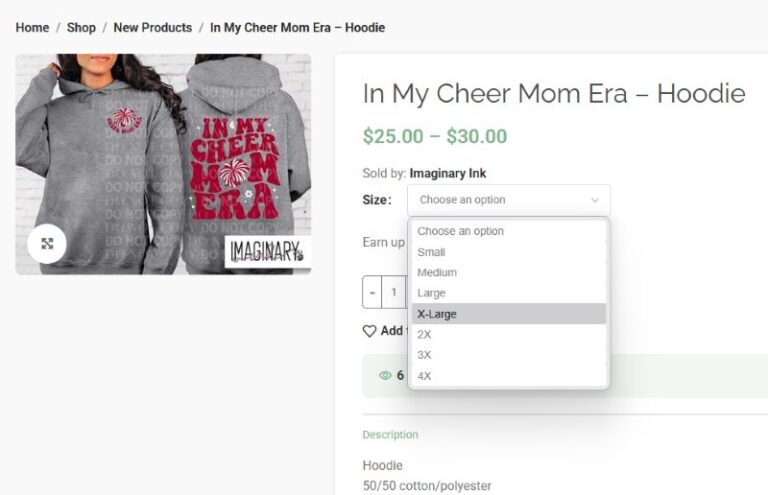
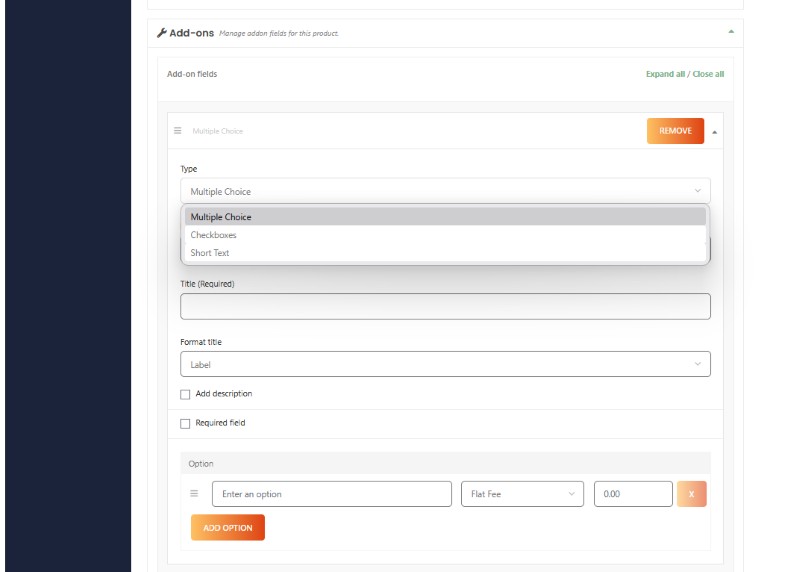
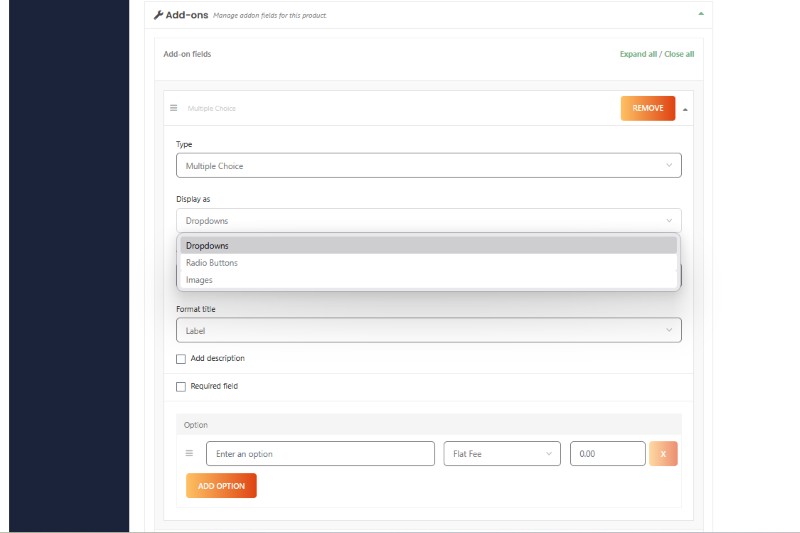
Product Add-Ons – How To Add Options
A variable product is a product that has different types of variants.
For example, you might want to sell a t-shirt that is available in 3 different colors and sizes.
So this option will enable you to add the variations you need.
Example: Two Product Options
Size: Small, Medium, Large
Color: Red, White, Blue
You can add variations based on anything you like.
Choose the following to display options like our sample above.
Type: Multiple Choice
Display As: Dropdown
Format Title: Label
Click the Add Options button to apply changes or Remove button to discard changes.
Also, you can charge an optional fee for additional add-ons. See images below.